FREESKY Blogs
Stay updated with the latest news, tips, and insights on e-bikes, technology, and sustainable riding through the FREESKY blog.


There's no item in your cart.
You May Also Like
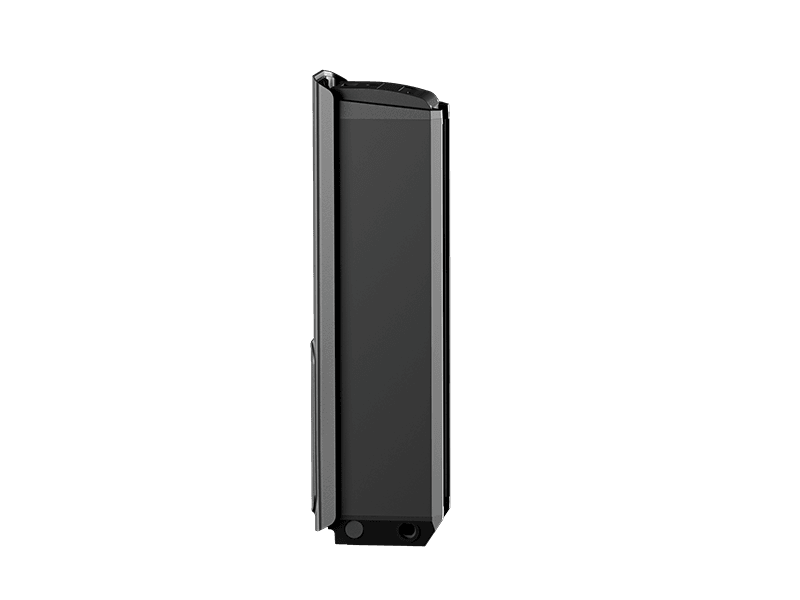
Extra Battery Pack
€600,00
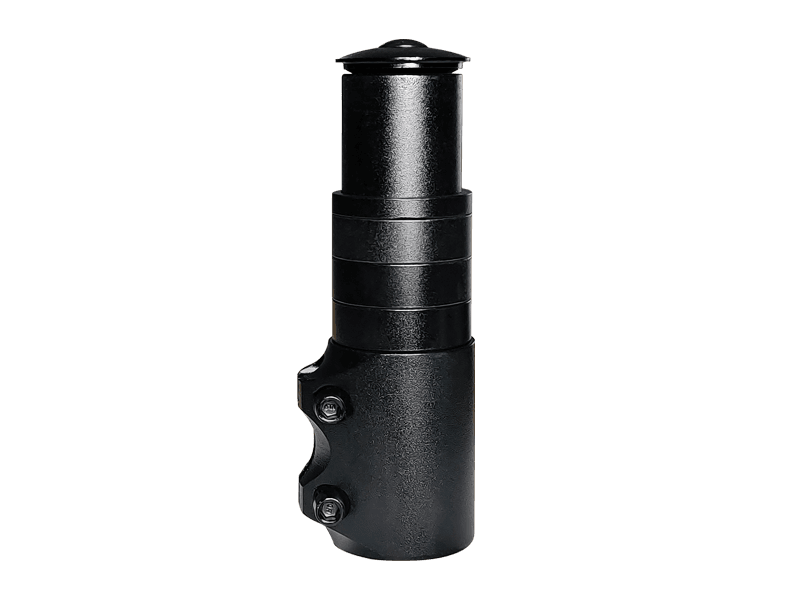
Stem Extender
€40,00
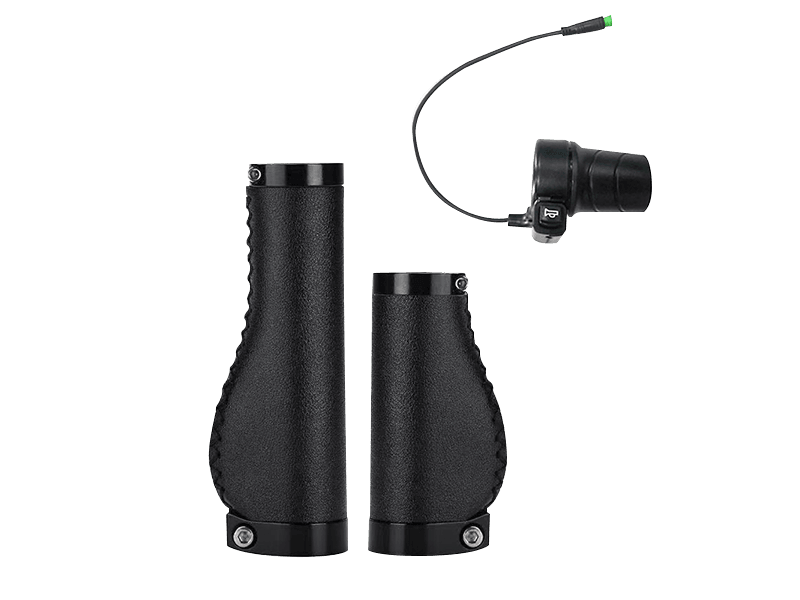
Twist Throttle with Grips
€69,00
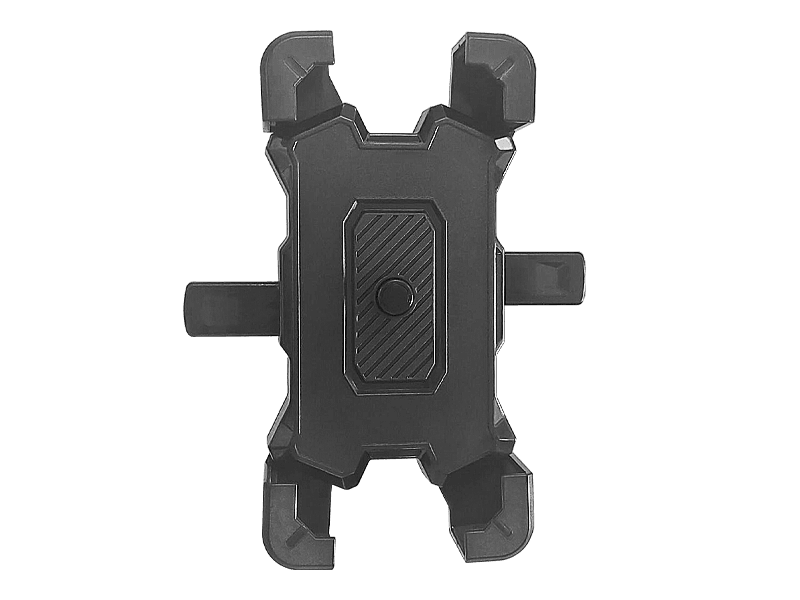
Phone Holder
€19,99
You're Saving €0,00
Shipping, taxes, and discount codes calculated at checkout.All Topics

How to Maintain Your E-Bike Suspension Fork for Optimal Performance
Aug 08, 2025 09:00
The suspension system on an e-bike absorbs bumps and vibrations from the road, ensuring a smoother, safer, and more controlled ride. Different types of shock absorbers offer varying levels of cushioning, which directly affect ride comfort. Regular maintenance of the damping system is crucial for performance, safety, and longevity. This guide explains how to properly maintain your e-bike’s front suspension fork for optimal performance in European conditions. What Is an E-Bike Suspension Front Fork? An e-bike suspension fork improves ride comfort by absorbing shocks from uneven roads and trails. Suspension forks are generally available in three types: spring, air (pneumatic), and hydraulic, each offering distinct cushioning characteristics. Beyond absorbing shocks, they also improve stability and control, allowing riders to navigate urban streets, gravel paths, or rugged terrain safely. Key Components of a Suspension Fork Steerer Tube: Connects the fork to the bike frame. Stanchions: Two vertical tubes sliding in and out of the sliders; contain springs, air chambers, or oil. Sliders: Allow smooth stanchion travel and connect the fork to the front wheel. Common Issues in E-Bike Suspension Forks With regular use, suspension forks may develop issues that affect performance and safety. Common problems include: Squeaking or Creaking: Caused by friction; requires lubrication. Leaks: Worn seals in pneumatic or hydraulic forks can cause oil or air leaks. Bottoming Out: Hitting the travel limit indicates incorrect fork adjustment. Low Air Pressure (for air forks): Reduces shock absorption and steering stability. Damaged Fork Surface: Scratches or dents can compromise seals and lead to leaks. Unusual Noise or Movement: May indicate internal wear or mechanical problems. How to Maintain Your E-Bike Suspension Fork Proper maintenance ensures smooth operation, reliability, and safety. Follow these steps: 1. Keep It Clean Wipe stanchions with a soft cloth before and after each ride. Use water and mild soap for a deeper clean; avoid high-pressure washers to prevent seal damage. Pay attention to crevices to remove dirt and grit. Dry the area around the seals thoroughly. 2. Lubricate Apply suspension-specific oil to the upper seals. Allow approximately 20 minutes for proper penetration. Regular lubrication reduces friction and enhances smooth fork movement. 3. Check Settings Inspect air pressure (for air forks) or oil level (for hydraulic forks) regularly. Adjust damping based on terrain and riding style for optimal performance. 4. Inspect for Damage Look for scratches, dents, or impacts on the fork assembly. Significant damage should be assessed and repaired by a professional. 5. Maintain Tyre Pressure Correct tyre pressure enhances the fork’s shock absorption. Ensures consistent cushioning and stability. Recommended Maintenance Intervals Frequent riders: Inspect forks weekly. Occasional riders: Check every two to three weeks, or after riding on rough or dusty trails. Always clean and inspect forks after wet, muddy, or gravel paths. Conclusion Proper care of your e-bike suspension fork improves comfort, control, and safety while riding in urban and rural European environments. Routine cleaning, lubrication, and inspection can prevent common issues and extend the fork’s service life. For visible damage or seal leaks, seek professional repair immediately to maintain safety. By prioritising maintenance, riders can fully enjoy a smooth, controlled, and safe riding experience.
Read More
5 Quick Ways to Keep Your Electric Bike Frame Tight and Secure
Aug 01, 2025 09:00
It often begins with a small creak. Then a slight wobble as you roll over cobblestones or uneven road surfaces. You’re not imagining it—your electric bike frame may genuinely be loosening over time. The good news is that in most cases, it can be resolved with simple checks and adjustments you can do yourself. By keeping your frame secure, you not only improve riding comfort but also ensure safety on every journey. How to Recognise Frame Looseness Creaking noises: Metallic rubbing or clicking sounds when accelerating, climbing, or cornering. Unstable ride feel: A soft or shifting sensation when crossing bumps or rough surfaces. Loose hinges or connectors: Noticeable play in folding mechanisms or frame joints. Wheel misalignment: If the front and rear wheels do not line up properly when the bike is lifted, the frame may be twisted or deformed. Five Checks to Keep Your Frame Solid 1. Headset and Stem If the handlebars feel unstable or click during turns, the headset or stem may be loose. What to do: Hold the front wheel firmly between your legs. Turn the handlebars—if they move independently, tighten the bolts with a hex key. Tighten only until secure, avoiding excessive force. 2. Seat Post Clamp A slipping seat post can create movement in the rear section of the frame. What to do: Loosen the clamp, adjust the saddle height, then retighten. Use a torque wrench if available for precise tightening. Apply carbon paste (for carbon posts) or grease (for alloy) to minimise slipping. 3. Crankset and Bottom Bracket Creaks while pedalling often mean play between the crank arms or bottom bracket. What to do: Test each crank arm for side-to-side movement. Tighten crank bolts with the correct tool. If the bottom bracket is loose or worn, consult a professional workshop for service or replacement. 4. Folding Joints (for Folding E-Bikes) Folding hinges and latches bear constant stress. Even small gaps can cause instability. What to do: Fully unfold and secure the bike. Check for movement at the hinge and retighten bolts. Lubricate where necessary.⚠️ If the joint cannot be tightened safely, contact your service provider before riding again. 5. Rear Triangle and Axle Area The rear section is vital for stability. What to do: Confirm axle nuts or quick-release levers are tightened correctly. Inspect welds for cracks or signs of stress. Check derailleur hanger and brake mounts are properly fastened. Why It Matters A loose frame is not just uncomfortable. If left unchecked, it can lead to: Increased wear on components. Frame fatigue and cracks. In rare cases, sudden structural failure. Your e-bike’s frame is its foundation. Regular checks are as important as monitoring tyres and battery levels. How to Prevent Frame Looseness Monthly inspection: Check headset, seat post, crankset, and joints. Extra care after rain or cleaning: Moisture may accelerate corrosion and loosening. Use correct tools: Invest in a hex key set and torque wrench. Professional servicing is advised for regular riders. Built for Long-Term Stability High-quality frames are designed to resist flex and vibration, ensuring long-lasting reliability. Freesky e-bikes are engineered with this principle in mind—reinforced structures and precise manufacturing help maintain frame integrity even under demanding riding conditions. Final Thoughts A stable ride starts with a secure frame. By carrying out these five simple checks, you can keep your electric bike safe, responsive, and enjoyable to ride. Ride safe. Ride with confidence. FAQ: Frame Looseness 1. Do all creaks mean the frame is loose?Not always. Some noises come from the saddle, pedals, or brakes. But headset, crankset, or folding joints are the first areas to inspect. 2. Is it safe to ride if the frame feels unstable?It is not recommended. Even short rides may cause further damage or safety risks. 3. Are folding bikes more affected?Yes. Folding hinges and latches require more frequent checks due to their design. 4. How often should I check the frame?Once per month is advisable. More often if riding daily or over rough terrain. 5. How tight should bolts be?Snug, but not over-tightened. Using a torque-limited tool is the safest option.
Read More
How Do Electric Bikes Perform on Hills? Understanding the Technology Behind the Climb
Jul 25, 2025 09:00
Have you ever struggled to power your way up a steep hill on a bike, arriving at the top breathless and worn out? Whether you're cycling through the mountain roads of Austria, climbing the cobbled streets of Lisbon, or navigating uneven trails in the Pyrenees, hills are among the most demanding aspects of riding across Europe. Electric bikes (e-bikes) offer an effective and modern solution—especially when equipped for hill performance. By combining electric motor support with your own pedalling power, e-bikes allow you to ascend more comfortably, efficiently, and with greater confidence. In this article, we’ll explore how e-bikes handle hill climbing, which Freesky models are most suitable for tackling steep or prolonged inclines, and why Warrior Pro and Alaska Pro stand out when serious climbing ability is required. Do Electric Bikes Work Well on Hills? Yes—e-bikes are particularly effective on hills, thanks to their ability to provide extra torque and assistance precisely when you need it. This makes them a great fit for riders in mountainous or hilly areas, those commuting across elevation, or anyone seeking to reduce the physical strain of climbing. Models equipped with robust motor systems and responsive controllers can handle steep gradients with ease—even when carrying luggage or cargo. Top Performers: Warrior Pro & Alaska Pro At Freesky, we build e-bikes for real terrain challenges. Two of our most capable models for hill riding are: 🔧 Warrior Pro: Dual-Motor Climbing Strength Dual hub motors (front and rear), working together to deliver exceptional climbing force Full suspension frame, for increased traction and control on uneven or gravel surfaces 48V 30Ah Samsung lithium battery, offering reliable power over sustained climbs Built for maximum torque delivery, ideal for steeper gradients and trail conditions Warrior Pro is the optimal choice for riders seeking to overcome tough inclines, manage off-road terrain, or carry additional load with confidence. 🔋 Alaska Pro: Endurance for Long Hills Dual battery setup: total capacity 48V 41Ah Extended range—ideal for touring, long-distance hill routes, and multi-day rides Full suspension and rugged frame design for comfort across varied terrain Delivers consistent power support throughout prolonged climbs Alaska Pro is perfect for cyclists who prioritise distance, reliability, and climbing endurance in demanding conditions. How the Technology Helps You Climb Torque & Motor Response When climbing, you need steady power that adapts to the gradient. Warrior Pro’s dual motor system provides: Easier starts on steep hills—even with added cargo Stable climbing over loose, rocky, or uneven surfaces Reduced rider fatigue across long or repetitive ascents Battery Capacity & Power Management Alaska Pro’s dual battery system is designed for endurance, offering: More energy availability during climbing efforts Stable voltage and power delivery over longer distances Support for multi-hill rides without the need to recharge Controller Precision Both Warrior Pro and Alaska Pro feature smart controllers that adapt motor output based on riding input and slope: Smooth transitions between assist levels Efficient battery use on mixed gradients Enhanced safety and riding comfort, especially on unpredictable terrain Support Models: Rocky Pro While Warrior Pro and Alaska Pro are the top choices for demanding hill rides, Freesky also offers a versatile model suitable for moderate climbs and daily urban gradients: Rocky Pro: Everyday Utility with Cargo Capability Speed-sensor based pedal assist system for predictable support 48V 25Ah Samsung lithium battery for extended urban use Robust frame supports cargo racks and child seats Ideal for moderate slopes, city commuting, and delivery or family riding Rocky Pro is a dependable, cargo-friendly e-bike well suited to everyday routes involving light hills. Which Freesky Model Should You Choose for Hill Climbing? Model Sensor Type Battery Setup Best For Warrior Pro Speed sensor 48V 30Ah Samsung (dual motor) Steep climbs, off-road trails, high torque demand Alaska Pro Speed sensor Dual 48V 41Ah Extended hill routes, countryside touring Rocky Pro Speed sensor 48V 25Ah Samsung Cargo use, moderate hills, city gradients Conclusion: Conquering Hills with Freesky E-Bikes Whether you're exploring alpine roads, cycling through the Balkans, or simply navigating steep streets in your local town, Freesky e-bikes offer the power and control to make climbs more enjoyable and less tiring. Choose Warrior Pro for top-level climbing torque and trail versatility Opt for Alaska Pro when distance, hill repetition, and extended power delivery matter Select Rocky Pro for day-to-day utility and moderate hill support Freesky Europe builds each e-bike with purpose—for the climbs, the journeys, and the everyday challenges of riding across Europe.
Read More
Do I Need a Full Suspension Electric Mountain Bike?
Jul 11, 2025 09:00
When buying your first electric mountain bike (e-MTB), one of the key decisions you’ll face is whether to choose a hardtail or a full-suspension model. This choice has a major impact on your riding comfort, bike performance, and maintenance requirements — especially when riding across Europe’s varied terrains. In this guide, we’ll compare hardtail and full-suspension e-MTBs in terms of design, ride comfort, suitability for different conditions, and long-term ownership. Whether you cycle through Alpine singletrack, Mediterranean coastlines, or cobbled city streets, understanding these differences will help you make the right decision. Why This Comparison Matters Across Europe, cycling conditions vary dramatically — from the rocky trails of the Dolomites and Pyrenees to the muddy forest paths in Germany, or even cobbled streets in older cities like Bruges or Prague. Your choice of suspension will influence how comfortable and confident you feel across these terrains. - Hardtail e-MTBs: Suspension only in the front fork. Lighter, more efficient, and typically more affordable. Ideal for smoother trails and daily use. - Full-Suspension e-MTBs: Suspension at both front and rear wheels. Designed for comfort and control over technical or rough terrain. Making the right choice ensures you enjoy your ride without overspending on features you may not need. Key Differences: Hardtail vs. Full Suspension e-MTB 1. Suspension System - Hardtail: Equipped with only a front suspension fork. Suitable for gravel roads, forest paths, and less technical countryside trails. - Full Suspension: Features both front and rear suspension. Ideal for rugged terrain, Alpine climbs, and rocky descents. 2. Price - Hardtail e-MTBs: Typically range from €1,300 to €2,800. A great choice for beginners and commuters. - Full Suspension e-MTBs: Usually start from €3,200 and can exceed €6,500. Best suited for off-road and mountain use. 3. Maintenance - Hardtail: Fewer moving parts make it easier to service and more reliable in the long term. - Full Suspension: Requires regular maintenance on pivot points and rear shock components. Recommended for riders familiar with bike servicing or willing to visit a service centre. 4. Ride Comfort - Hardtail: Offers good comfort on smooth or slightly bumpy roads but can feel harsh on rocky or uneven surfaces. - Full Suspension: Soaks up both small vibrations and larger impacts, reducing rider fatigue on long or rough rides. 5. Handling and Control - Hardtail: Offers sharp handling and efficient energy transfer, especially on climbs or hard-packed trails. - Full Suspension: Provides better traction and control when descending, cornering, or riding on loose or steep surfaces. Usage Scenarios Best for Hardtail e-MTBs: - Countryside touring and vineyard trails in France, Spain, or Italy - Gravel cycling and long-distance routes like EuroVelo paths - Commuting on mixed-surface roads in suburban or semi-rural areas - Weekend leisure riders looking for simplicity and efficiency Best for Full Suspension e-MTBs: - Mountain trails in the Alps, Dolomites, or Sierra Nevada - Technical forest terrain in Belgium, Austria, or northern Scandinavia - Aggressive descents, enduro or bike park use - Heavier riders or those needing more comfort and traction Battery Efficiency Because they’re lighter and simpler, hardtail e-MTBs typically consume less battery power. This results in longer range per charge — a key consideration for touring or extended countryside riding. Full-suspension bikes offer superior comfort but can be slightly less efficient due to the extra weight and rolling resistance of the suspension system — especially when using high assistance levels in mountainous areas. Pros and Cons Summary Feature Hardtail e-MTB Full Suspension e-MTB Suspension Front only Front and Rear Comfort Moderate (smooth terrain) Excellent (all terrain) Price Range €1,300–€2,800 €3,200–€6,500+ Maintenance Low, user-friendly Higher, more complex Weight Lighter Heavier but more stable Battery Efficiency Higher range per charge Slightly reduced range Best Use Daily riding, XC, light trails Mountains, enduro, rough trails FAQs Q1: Is a hardtail good enough for trails in Europe?Yes — especially in flat or rolling regions like the Netherlands, western France, or central Germany. For demanding trails in mountainous zones, a full-suspension model is better suited. Q2: Is a full suspension e-MTB worth it for Alpine riding?Absolutely. In places like Austria, Switzerland, or northern Italy, full-suspension bikes offer better traction and comfort when climbing or descending rocky paths. Q3: Do full-suspension bikes require more maintenance?Yes. Due to additional moving parts (linkages, rear shocks), they require more frequent servicing — ideally at a professional e-bike service centre. Q4: Can I use a full-suspension bike in the city?Yes. In older cities with cobblestones or poorly maintained roads, full-suspension bikes can greatly enhance comfort — though they may be overkill for smooth tarmac Choosing between a hardtail and a full-suspension electric mountain bike comes down to three things: terrain, comfort, and budget. - Choose a hardtail if you mainly ride on flat or moderately bumpy terrain, want a lighter bike with more range, and prefer low maintenance. - Choose a full suspension if you ride technical trails, live in a hilly or mountainous area, or want maximum comfort and control. At FREESKY EU, we offer a wide selection of both hardtail and full-suspension e-MTBs designed for real European conditions — from city commutes to Alpine adventures. 👉 Explore our full-suspension e-MTBs👉 Browse our hardtail e-MTB collection
Read More
14 Essential Tips for Buying an Electric Mountain Bike
Jul 04, 2025 09:00
Buying your first electric mountain bike (e-MTB) can feel overwhelming. With countless brands, models, and specifications across Europe, it’s not always easy to know where to begin. How much should you budget for a high-quality e-MTB that performs well on varied European trails — from the rocky climbs of the Alps to the forest routes of the Ardennes? Should you choose a full suspension or hardtail setup? What’s the right motor system for your needs? With years of hands-on testing and rider feedback from across the continent, we’ve put together 14 essential tips to help you make a confident and informed purchase — no matter where in Europe you’re riding. 1. Set a Realistic Budget Entry-level e-MTBs across Europe typically start from around €3,000–€4,500 for hardtails and basic full suspension models. These are ideal for light trail use and forest roads. For more demanding terrain — like the Pyrenees, Black Forest, or Dolomites — expect to invest €5,000–€8,000 for better suspension, stronger motors, and more reliable components. Online retailers offer competitive pricing but often require self-assembly. European bike shops provide professional setup and personalised advice, especially valuable for first-time buyers. 2. Choose Suspension According to Terrain Suspension travel affects comfort and control. In Europe’s mixed terrain, full suspension e-MTBs are recommended to absorb impacts and improve traction. - XC/Trail (up to 140mm): Light trails and moderate climbs - All Mountain (140–160mm): Most versatile, ideal for general European terrain - Enduro (160–180mm): Technical descents, alpine riding - DH (180mm+): Gravity parks or downhill-specific trails 150–160mm travel offers the best all-rounder performance for most European riders. 3. Full-Powered or Lightweight? - Full-powered e-MTBs (75–108Nm, 720–900Wh) offer strong support for alpine climbs and long rides but are heavier. Ideal for heavier riders or those tackling steep gradients. - Lightweight e-MTBs (35–60Nm, 320–430Wh) offer a natural pedalling feel and better agility but shorter range. Choose based on terrain, physical condition, and desired riding feel. 4. The Motor Matters — Not Just Power Europe’s top motor systems include Bosch, Shimano, Yamaha, Brose, and TQ, each offering refined performance and broad service networks across the EU. A notable option is Bafang, widely used in direct-to-consumer brands and known for its powerful M620 (Ultra) motor, delivering up to 160Nm of torque — ideal for steep climbs and heavier riders. Bafang is increasingly supported across Europe with spare parts and technical service. Don’t just compare torque numbers. Consider ride feel, assist modes, firmware, and local support availability. Bosch’s eMTB mode and Shimano’s adaptive tuning offer intuitive response across technical terrain — key for confident riding. 5. Battery Size — Think Balance Battery capacity impacts range and handling: - Lightweight bikes: 320–430Wh - Mid-range: 500–630Wh - High capacity: 720–900Wh+ A larger battery extends range but adds weight high on the frame. Smaller packs reduce weight but may not support long alpine routes. Most European riders benefit from 630–720Wh for all-day trail rides. 6. Plan Range According to Elevation Steep European trails (e.g. Dolomites, Vosges) require more assist power. Elevation gain, rider weight, trail surface, and assist level all affect battery life. Ride smoothly, use eco/trail modes when possible, and check real-time range indicators to avoid battery anxiety. 7. Weight — It’s Not All About Lightness E-MTBs typically weigh 20–46kg. Heavier bikes offer downhill stability, while lightweight builds (especially carbon) are agile and climb-friendly. Consider your strength and intended terrain. A heavier bike may inspire confidence on fast descents. 8. Get the Right Geometry Use manufacturer size guides and test-ride if possible. European riders vary in preferences: - Aggressive riders: slacker head angle (63–65°), longer reach for high-speed control - All-rounders: steeper angles (66–68°), compact geometry for nimble steering 9. Wheel Setup: 29er vs Mullet - Full 29er: Stable, better rollover on roots and rocks - Mullet (29” front / 27.5” rear): More agile, popular in technical singletrack 10. Alloy or Carbon Frame? - Carbon: Lighter, stiffer, premium pricing - Alloy: More affordable, durable, better for rugged trails in wet regions (e.g. UK, Germany) 11. Check Tyres, Brakes, Drivetrain - Tyres with reinforced casings and aggressive tread handle wet and rocky European trails. - Brakes: 4-piston calipers and large rotors (180–203mm) ensure reliable stopping on long descents. - Drivetrains: Look for Shimano Linkglide or SRAM Transmission for smooth shifting under torque. 12. Online vs In-Store Purchase European consumers benefit from both direct-to-consumer brands and established bike shops. - Online: Better pricing, wider variety, good for confident mechanics - Shops: Assembly, tuning, test rides, and after-sales support 13. Upgrade Potential Choose a bike with room to grow: upgradeable suspension, adjustable geometry (flip chips), and space for better components. This extends value and adapts to evolving riding styles. 14. Read Local Reviews Seek out Europe-specific reviews and rider forums. Focus on: - Long-term durability - Component availability - Motor service support - Trail performance in your region’s climate Ride with Confidence — Across Europe Choosing the right electric mountain bike requires balancing performance, weight, support, and cost — all relative to where and how you ride. Whether exploring alpine passes or forest trails, a properly equipped e-MTB unlocks new adventures. At FREESKY, we design our electric mountain bikes with European terrain and riders in mind — blending performance, durability, and premium components at a competitive price. Explore our range and ride beyond limits. Discover FREESKY E-MTBs
Read More

Hardtail vs Full‑Suspension e‑MTBs: A Comprehensive Guide for Riders
Jun 27, 2025 08:52
Hardtail and full‑suspension electric mountain bikes both offer comfort compared to rigid models, but choosing the right type can significantly improve your ride. In this guide, we'll compare designs, performance, maintenance, and usage, helping you choose your next e‑MTB with confidence. Why This Comparison Matters Selecting between a hardtail e‑bike (which has suspension only in the front fork) and a full‑suspension e‑MTB (equipped with both front and rear suspension) affects how the bike handles typical European terrain, your comfort, and upkeep. Whether riding in the Alps, across Catalonia’s rugged trails, or through forested routes in the Ardennes, the right bike makes all the difference. 1. Suspension System Hardtail e‑MTB: Front suspension only. Suitable for smoother bike paths, gravel routes, and paved forest tracks. Full‑suspension e‑MTB: Comes with both front fork and rear shock. Ideal for rougher environments—rocky descents, alpine switchbacks, and forest trails with roots and technical obstacles. 👉 In summary: hardtails are lighter and efficient; full-suspension bikes provide superior comfort and control on rough ground. 2. Cost and Value Hardtails: Generally more affordable (€1,200–€3,000), offering excellent value for everyday riders. Full‑suspension: Typically priced from €1,800 to over €7,000, reflecting advanced suspension and frame complexity. Choose based on your terrain and how much comfort, control, and durability you're willing to invest in. 3. Maintenance Hardtail e‑bikes: Simpler design, fewer moving parts—easier to maintain and repair. Ideal for low-maintenance riders. Full‑suspension: Requires more regular servicing of shock, pivot bearings, and seals. When maintained well, they’re durable—just be prepared for upkeep. 🔧 Tip: A professional service once or twice a year helps extend lifespan. 4. Handling and Control Hardtails: Stable and manoeuvrable on smooth paths and urban environments. Full‑suspension: Offers better traction and control on technical trails and uneven surfaces. Perfect for confident descending and tackling roots and rocks. 5. Speed and Efficiency Hardtails: Lighter and more efficient on flat roads and gentle climbs. Better energy use and longer battery range. Full‑suspension: Heavier but more stable on tricky terrain. Battery drains faster, but they maintain speed and confidence on off-road rides. 6. Comfort and Ride Quality Hardtails: Adequate for smooth surfaces, but you’ll feel more vibration on rough terrain. Full‑suspension: Dual absorbers make long rides much more comfortable, reducing rider fatigue and easing strain on joints. Usage Scenarios Hardtail e‑Bikes Perfect for: Urban commuting Bike path outings Light cross-country routes Budget-conscious riders Full‑Suspension e‑Bikes Ideal for: Mountain biking Technical trails Long epic rides Riders who want comfort and control on rough terrain Pros and Cons Summary Aspect Hardtail e‑MTB Full‑Suspension e‑MTB Price ✔️ More affordable ❌ More expensive Weight/Power ✔️ Lighter & efficient on flats ❌ Heavier, more battery use Comfort ✔️ Decent on smooth trails ✔️ Excellent on rough terrain Control ✔️ Agile and responsive ✔️ Superior traction and stability Maintenance ✔️ Simpler, reliable ❌ Requires routine servicing Trail Capability ✔️ Light trails only ✔️ All-terrain & technical trails Buying Guide: What to Consider Budget: Hardtails approx. €1,200–€3,000 | Full‑suspension from €1,800+ Terrain: Smooth journeys = hardtail | Rough or varied = full-suspension Maintenance: Simple upkeep vs more components Experience level: Hardtails suit beginners | Full‑suspension best for experienced riders Test Ride Tips When trying bikes: Assess comfort and fit Test suspension performance Notice gear and brake feel Ride varied terrain: flat, hills, twisty paths Check battery life during longer rides Final Verdict Hardtail e‑MTBs are ideal for practical, cost-effective transportation and light trail rides. Full‑suspension e‑MTBs are better suited for adventurous riders seeking superior comfort, control, and performance across rugged terrain. Why Choose Freesky? Our range includes models to suit all riding needs: Warrior Pro: A nimble full-suspension e‑MTB equipped with a Samsung-powered 48V 30Ah battery and dual suspension system—ideal for tackling technical trails across Europe with comfort and confidence. Alaska Pro: A long-travel, full-suspension powerhouse with 48V 41Ah battery—designed for endurance rides across diverse terrain.
Read More
How to Maximise Your eBike Battery Life: Expert Advice for Riders
Jun 06, 2025 09:00
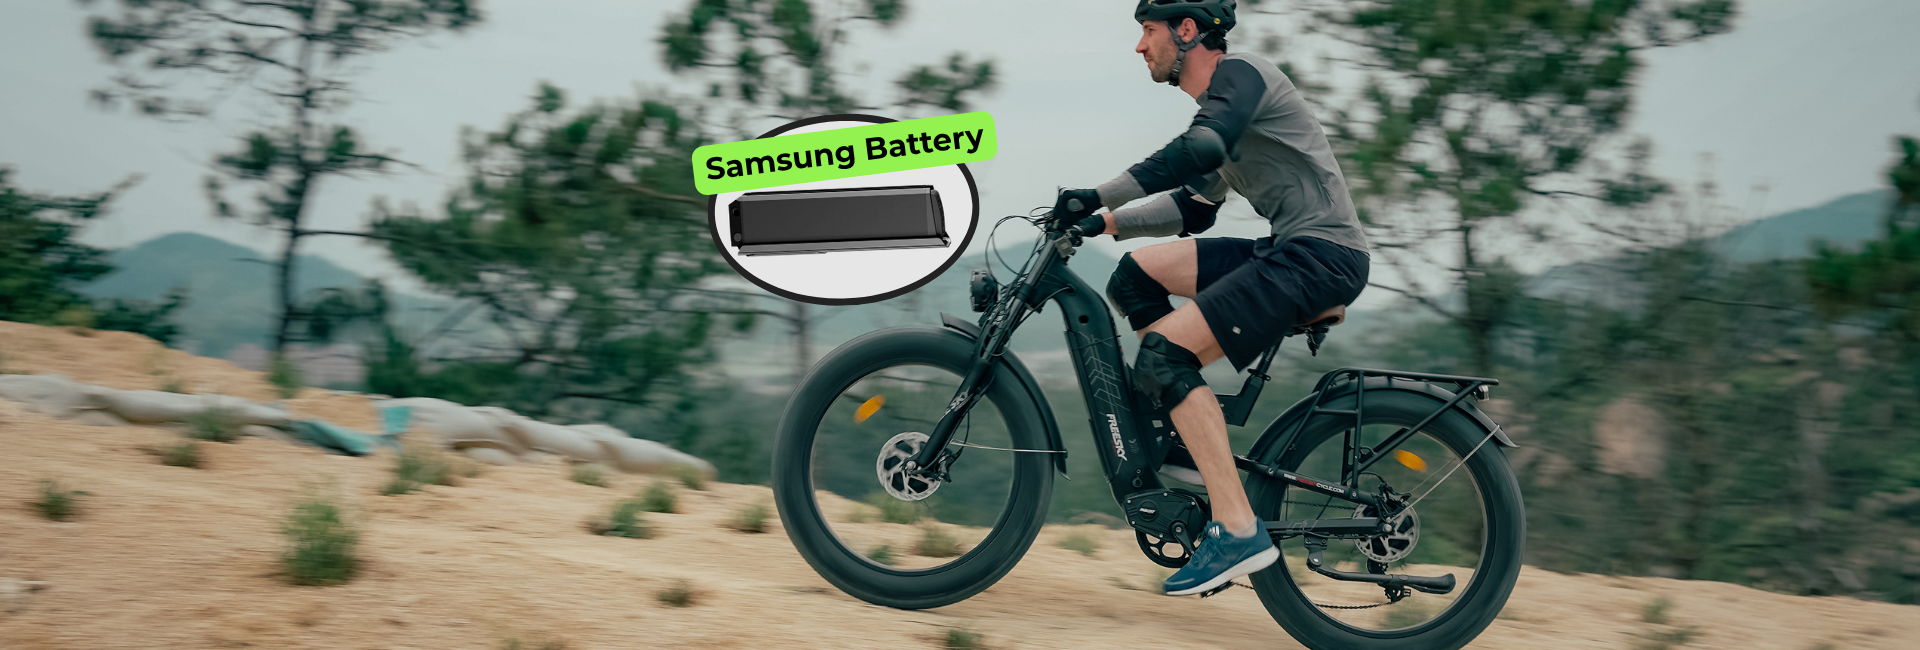
The battery of your electric bike typically represents about one third of the bike’s total value, making it a crucial component to choose carefully and maintain properly. At Freesky, we focus on delivering high-quality batteries designed for longevity and reliable performance across Europe’s diverse riding conditions. Why Choosing the Best eBike Battery Matters for Riders in the EU When purchasing an electric bike in the European Union, it is essential to prioritise battery quality. We recommend eBikes equipped with premium battery cells from industry-leading manufacturers such as Samsung, Panasonic, or LG. These brands are renowned for their reliability, safety certifications, and extended lifespan. Freesky’s Warrior Pro model features a premium Samsung 48V 30Ah battery, perfectly suited for varied EU terrains and urban environments. For those requiring greater range, the Alaska Pro model offers a larger 48V 41Ah battery, ideal for longer journeys and eMTB enthusiasts. All Freesky batteries are UL 2271-certified, meeting stringent global safety standards that are widely recognised in the EU market. This certification ensures the battery meets critical criteria for electrical, mechanical, and environmental safety—offering you true peace of mind. Beware of low-cost batteries common in discount outlets—they often lack comprehensive warranties and necessary quality controls. Investing in a quality battery upfront helps avoid early replacements and potential safety risks. Understanding Lithium-Ion Battery Technology in European eBikes Nearly all modern eBikes in the EU use lithium-ion or lithium-polymer batteries. Although lithium battery technology has existed since 1912, its adoption in consumer eBikes has surged only in the last 15 years due to cost improvements and reliability. The key difference between lithium-ion and lithium-polymer batteries lies in the electrolyte used. Lithium-polymer batteries offer a slight increase in energy density but at a 10-30% higher cost. Regardless, proper maintenance is the most significant factor in prolonging battery life. Essential Tips for eBike Battery Maintenance in the European Climate With proper care, lithium-ion batteries typically last 3 to 5 years. Here are three key maintenance tips tailored for EU riders: 1. Store Your Battery at Optimal Temperatures Temperature management is vital for battery health. Avoid exposing your battery to direct sunlight or extreme heat, such as leaving it in a car on a hot day, which accelerates degradation. Storing a fully charged battery in warm conditions is especially harmful. Keep your battery indoors in a cool, dry place, ideally below 20°C (68°F). In colder European winters, avoid charging the battery below freezing temperature to prevent cell damage. Riding in cold weather is safe, but store the battery indoors when not in use. Expect some loss in power and range during cold spells; this is normal. 2. Store the Battery Partially Charged Proper charge levels during storage can extend battery life. Aim to store batteries at 40% to 80% charge when not in use for extended periods. Use chargers with ‘storage mode’ if available, to maintain ideal voltage. Avoid leaving the battery on charge continuously at full capacity. During the off-season, check your battery every few months and top up if necessary to prevent deep discharge. 3. Avoid Regular Full Discharges Regularly discharging your lithium-ion battery to zero is damaging. Lithium-ion batteries do not suffer from ‘memory effect’, so partial discharges with frequent recharges are recommended. Full discharges can occasionally occur, such as on long rides, without issue. For frequent short trips, charging every few rides is better than after every single trip, to avoid keeping the battery at full charge too long. Why Freesky’s eBike Batteries Are Ideal for European Riders Freesky’s UL 2271-certified batteries are built to meet the highest safety and durability standards in Europe. The Warrior Pro is equipped with premium Samsung cells, offering reliable performance for off-road and hybrid riders, while the Alaska Pro features a high-capacity 48V 41Ah battery designed for long-distance endurance and heavy-duty use. By following these practical maintenance tips, you can expect a reliable electric bike battery lifespan of 3 to 5 years, maximising your ride enjoyment while reducing costly replacements. Explore the Warrior Pro and Alaska Pro models with Freesky’s cutting-edge battery technology—designed for European conditions and rider demands.
Read More
How to Raise Handlebars on an Electric Mountain Bike (EMTB)?
May 22, 2025 09:00
Finding the right handlebar height is essential to enjoying a safe, comfortable, and efficient ride on your electric mountain bike (EMTB). Whether you're exploring alpine trails, commuting across hilly cities, or cruising rural routes, adjusting your e-bike's handlebar height can dramatically improve posture, handling, and fatigue reduction. In this guide, we’ll walk you through the common challenges EU riders face when it comes to handlebar height adjustment, and introduce a practical solution designed specifically for fat tyre EMTBs like those from FREESKY. 🚴 Why Handlebar Height Matters on an EMTB Many electric mountain bikes come pre-configured with aggressive riding positions, designed for power and speed. While this suits some riders, others—especially those using their eMTBs for daily commuting, long-distance travel, or recreational touring—often find the factory handlebar height too low. This can lead to: Back, neck, or shoulder strain on longer rides Wrist discomfort or numbness Reduced control on technical terrain A more tiring ride experience overall This is especially true for fat tyre eMTBs, which are bulkier and heavier than standard mountain bikes. A slightly higher handlebar position can shift your weight distribution for better control and comfort, particularly when navigating rough trails or urban roads. 🔧 Can You Adjust the Handlebar Height? Yes—depending on the design of your electric mountain bike, you may have a few options: Flipping or replacing the stem Repositioning spacers (if any exist above or below the stem) Using a stem extender – a simple, effective upgrade for most EMTBs ⚠️ Note: Freesky e-bikes are built with hydraulic disc brakes and robust components. Any adjustment should be made carefully, and we recommend reaching out to our support team if you're unsure about compatibility or installation. 🔩 A Practical Solution: Stem Extenders For most EMTB riders in Europe, the simplest way to raise the handlebar is to install a stem extender, a device that fits onto your bike’s steerer tube and elevates the height of your stem and handlebars without requiring full component replacement. FREESKY offers a dedicated Stem Extender designed to work seamlessly with our eMTB models. It’s especially useful on fat tyre bikes like: Warrior Pro – Built for all-terrain exploration Alaska Pro – Ideal for long-range comfort with dual battery setup Ranger – The lightweight, value-focused dual motor choice By using a stem extender, EU riders can achieve a more upright riding posture, reducing fatigue and increasing visibility, both off-road and in traffic. 👉 [Shop FREESKY Stem Extender Now] 🛠️ Installation & Tips Installing a stem extender typically requires basic tools and 15–30 minutes of your time. General steps include: Remove the top cap and handlebar stem Slide on the stem extender and tighten bolts evenly Reattach the stem and adjust to your preferred height Test ride and make final fine-tuning It’s recommended to double-check brake and cable tension after adjustment. If in doubt, consult a local bike technician or contact our customer support team. 🧭 Choosing Comfort Without Compromise In Europe, where cycling conditions vary from steep mountain roads in Austria to the cobbled lanes of Belgium, handlebar height customisation is not a luxury—it’s essential. Fat tyre eMTBs offer superior stability and traction, but without proper ergonomics, the ride can be unnecessarily fatiguing. A small adjustment like raising your handlebars using a stem extender can result in a noticeably better experience—making long-distance trekking, daily commutes, and rugged trail riding more enjoyable and safer. Final Thoughts Riding an electric mountain bike in Europe is as much about comfort and control as it is about power. If you’re experiencing back or wrist discomfort, or just want a more relaxed riding posture, adjusting your handlebar height is a smart first step. FREESKY’s Stem Extender offers an accessible, high-quality solution for riders seeking better ergonomics—no matter which of our eMTB models you ride.
Read More
How to Tighten Bike Brakes?
May 16, 2025 09:00
A European Guide to Hydraulic Disc Brake Adjustment for E-MTB Riders Reliable braking is vital for any bicycle, but especially for electric mountain bikes (e-MTBs), where added weight, speed, and rough terrain demand exceptional control. If your brake levers feel too soft or you're losing braking power, it's likely time for an adjustment. In this article, we’ll walk you through the essentials of tightening hydraulic disc brakes, with a focus on FREESKY e-MTBs such as the Warrior Pro, Alaska Pro, and Ranger—all equipped with advanced four-piston hydraulic disc braking systems. Why Brake Adjustment Matters for E-MTB Riders E-MTBs place greater stress on braking systems due to their weight and power. FREESKY’s e-bikes are designed with four-piston hydraulic disc brakes to deliver reliable and powerful stopping force in all terrains—from alpine trails to city commutes. Regular brake maintenance not only ensures your safety but also enhances your ride experience with smoother and more responsive control. Signs That Your Brakes Need Adjustment Here are common indicators that it’s time to check your e-bike’s brakes: Brake levers pull too close to the handlebar Spongy or inconsistent brake feel Decreased stopping efficiency Squeaking or rubbing noises without braking How to Adjust Hydraulic Disc Brakes These general steps apply to most modern hydraulic brake systems, including those found on FREESKY e-bikes: 1. Evaluate Lever Response Start by testing brake lever resistance. A lever that pulls in too far can indicate pad wear or caliper misalignment. 2. Check Pad Thickness Worn brake pads reduce braking power. If they appear too thin, they should be replaced with manufacturer-approved replacements. 3. Re-align the Caliper To correct rotor rubbing, loosen the caliper bolts slightly, squeeze the brake lever to centre the caliper, then retighten. 4. Adjust Lever Reach Hydraulic brake levers often include a small adjustment dial or screw to change how far the lever sits from the handlebar. This is useful for improving control and comfort. ⚠️ Note: If brake feel remains inconsistent after these steps, the system may require a hydraulic bleed. We recommend contacting our customer service team for guidance or visiting a qualified local bike technician. FREESKY's Four-Piston Brakes: Precision and Power All FREESKY electric mountain bikes—including the Warrior Pro, Alaska Pro, and Ranger—feature four-piston hydraulic disc brakes, offering: Superior stopping force even on steep descents Improved heat resistance during long braking sessions Smooth modulation for technical terrain and variable grip These benefits are magnified when paired with our 26" x 4" fat tyres, which provide: Enhanced comfort due to increased air volume Better traction and grip across loose or wet surfaces Greater stability and control than traditional narrow-tyre mountain bikes This combination of fat tyres and high-end hydraulic braking gives FREESKY riders unmatched performance across European roads and trails. Final Advice Tight, responsive brakes aren’t just about safety—they’re essential for fully enjoying your e-MTB. If you ride a FREESKY bike, rest assured that your braking system is engineered to perform at a high level, but periodic adjustments help keep everything in top condition. Need help or unsure how to proceed? Get in touch with our customer service team. We’re here to help you maintain a confident and safe riding experience—wherever in Europe you ride.
Read More